Demo web #3: This tutorial introduces design of a multi-page web site with graphics, links, and passwords.
Create a new project in SiteSpinner. Have your graphics files prepared ahead of time. We simply grabbed a few for a couple bucks a piece off iStockPhoto.com for demo use. We assume you might take pictures of an actual site you are monitoring.
To place a graphic, click on the Mona Lisa icon, and a file dialog will appear allowing you to locate the .gif or .jpg file on your PC. Simply click to drop it on the page, and grab and move as needed.
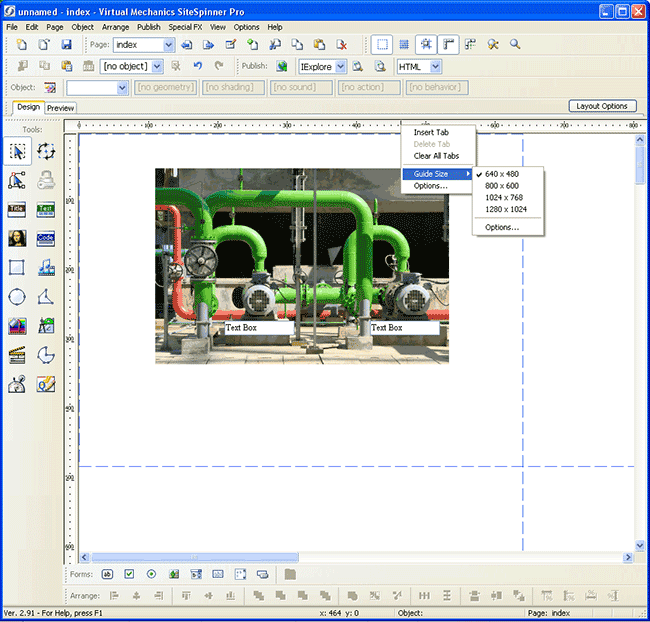
Right click on the ruler above the page to get to the Guide Size menu. This lets you select your page size.
Place text boxes by clicking on the text box in the Forms tool bar. If you place the graphic first, and text boxes next, the text boxes will appear on top of the graphic. If you need to rearrange the order, click on the graphic to select it, then select Order under the Arrange menu, and select "To Back" to push the graphic back. Now all of the text boxes will appear in front of the graphic.
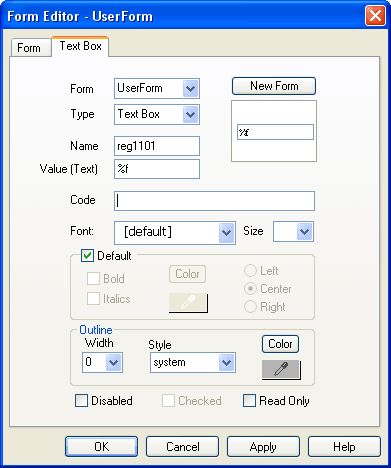
For each text box you place, set the Form Name to "UserForm", action to "icanForm", method to "post" as with all other text boxes. Assign names and values as applicable to get data from the server.

Select Add New Page under the Page menu to add more pages.
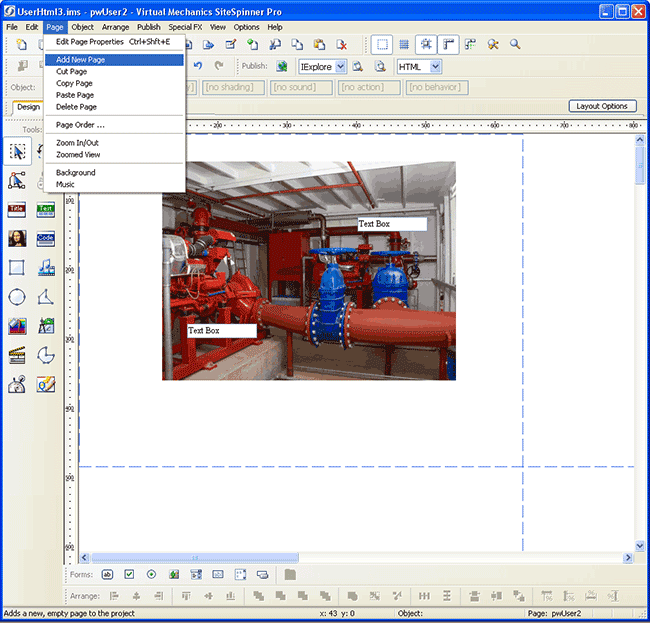
For each new page you add, the names of the pages will be added to the page list. You can edit the page names here, or open the Edit Page Properties dialog under the Page menu.
Your top level page must always be named User.html. Additional pages can be named any name that does not contain spaces or non-alphanumeric characters. There is one "trick" to page names: If the name starts with "pw", it will be password protected. This level of password protection is a level lower than the login required to enter the main pre-programmed page set in the i.CanDoIt server. This set of credentials is independent, meaning if you log in to a "pw" user page, and later log into one of the preprogrammed pages, you will need to re-enter you user name and password.
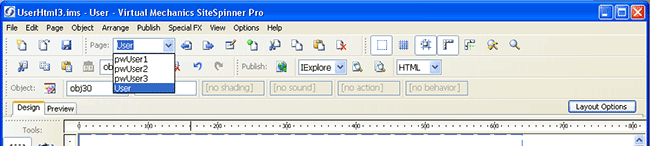
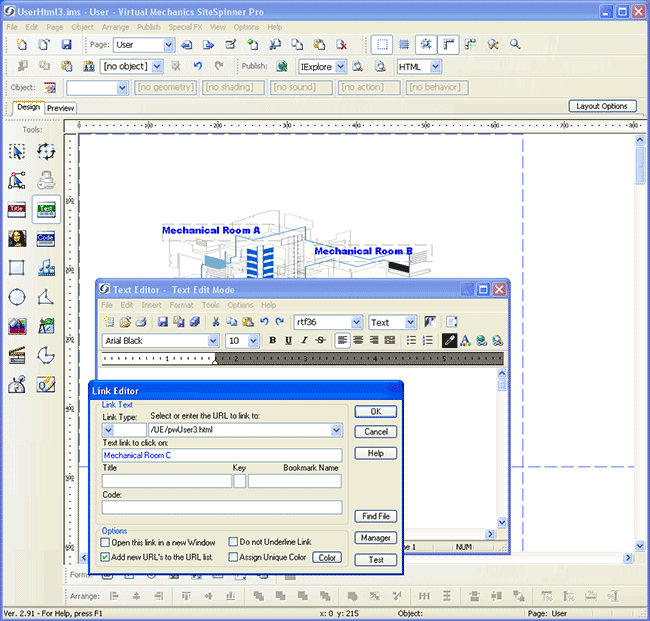
Our demo project now contains three password protected pages, plus the "home" page named User.html. Our home page is going to be a site diagram with links to the other pages. To create a text link, start by clicking the text icon on the tool bar on the left. This will open the text editing dialog you have already seen. But now click the link icon at the far right end of the formatting tools. This will open the Link Editor dialog. Enter the text to be clicked on, and the URL it should take you to. The URL will be the page name, with /UE/ in front of it. The /UE/ is the user escape signal to the i.CanDoIt server that this link is a user web page rather than a preprogrammed page. Without the /UE/, your page will not be found. But it also means that in preview mode, the links will not function inside SiteSpinner.
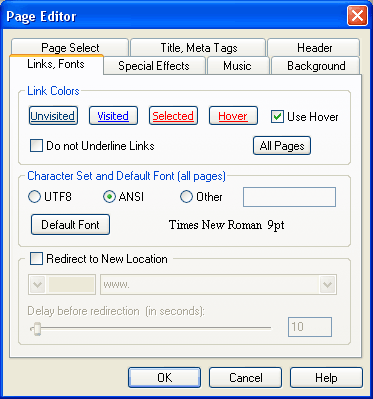
To change the color of text links, and also to turn on the Hover (mouse over) action, select Edit Page Properties under the Page menu. This opens the Page Editor dialog. Now select the Links, Fonts tab. Click on the link colors to select different colors. Check the Use Hover if you want the link to change when you hold the mouse over the link.
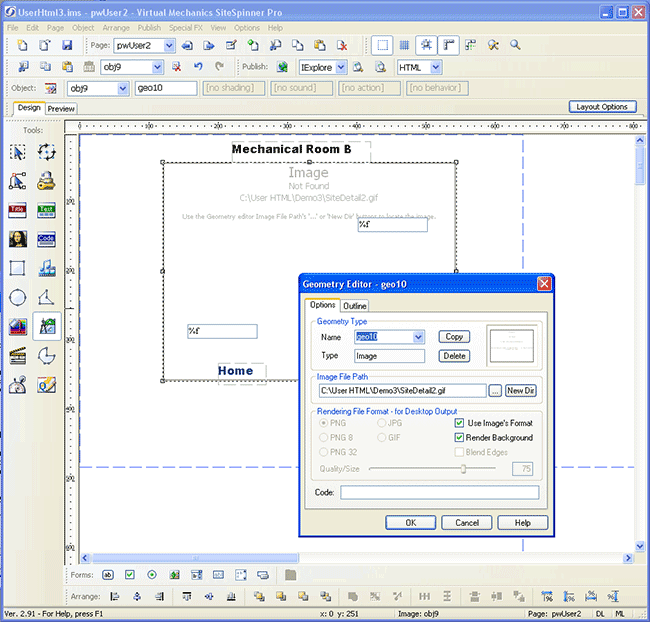
If you accidentally move a graphic file so that the link is lost, or you simply want to replace a graphic with a different one, click on the graphic to edit, then select the Geometry Editor from the tool bar on the left. Under Image File Path, simply browse for the replacement file.
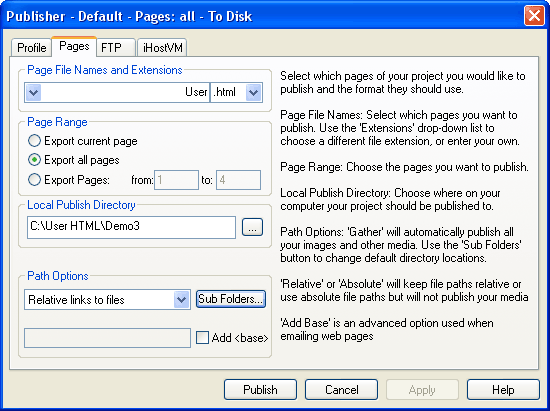
We are now ready to publish our site. Be sure to check "Export all pages" now that we have more than one. Select "Relative links to files" for Path Options. Click Publish, and then upload your files to the i.CanDoIt server.
The resulting site looks like this...

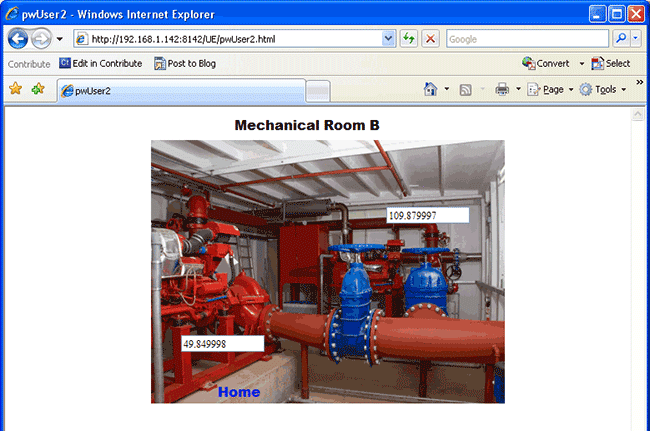
Clicking on the Mechanical Room B link brings up this page, and the others are similar.
Article ID: 27
Created On: Thu, Sep 10, 2015 at 12:57 PM
Last Updated On: Thu, Sep 10, 2015 at 12:57 PM
Online URL: https://info.csimn.com/article.php?id=27