The BB2-3020 or BB2-7020 BACnet to LonWorks gateways are normally used to put BACnet devices on a LonWorks network. As such, the configuration tool and auto-build features are geared toward creating a BACnet client that will poll one or more BACnet devices and present the data to the LonWorks network, or receive data from the LonWorks network to be written to the BACnet devices.
A less common but feasible scenario is one in which the gateway will be bound into a managed network using LonMaker or equivalent, but the device on the BACnet side is a BACnet front end system that acts as the client. In a sense, we now want the gateway to be a server (or slave) on both sides, and in this case, the direction of the Network Variables needs to get reversed from the default directions that would apply when the gateway is the client.
The following process needs to be followed to configure the gateway to behave this way.
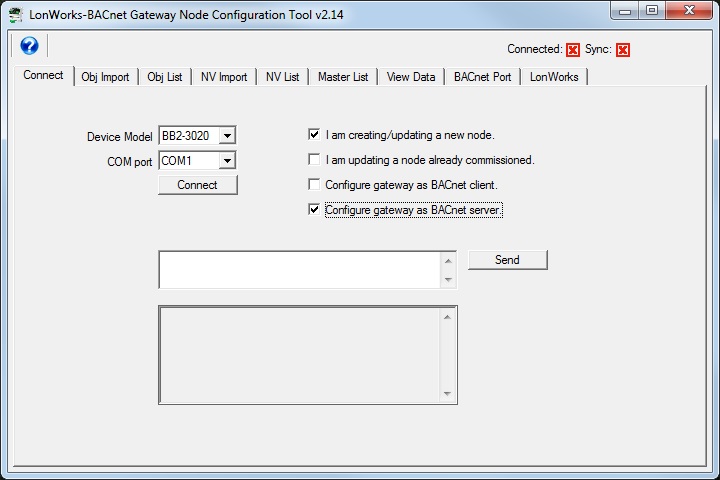
Start by telling the configuration tool that the gateway is going to act as a BACnet server.
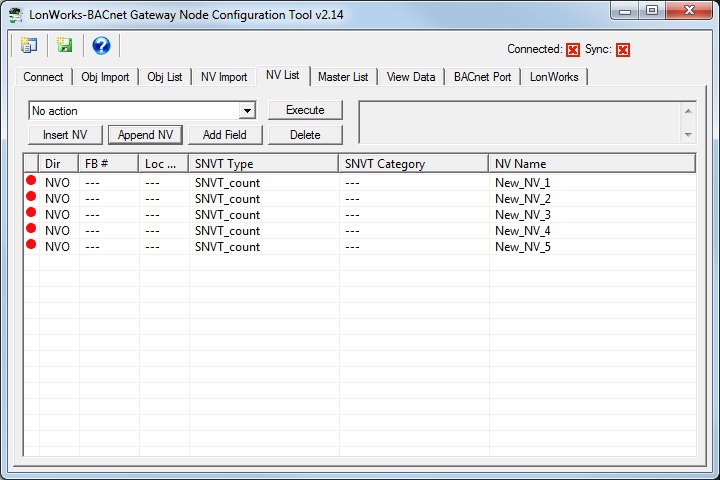
You must start with the network variables in this type of configuration. Go to the NV List page, and add whatever variables you will be binding. You can also import an XIF file if applicable via the NV import page.
In the following example, we start by creating a few variables. For this part of the process, simply click the Append NV button a few times. You will configure the details shortly.
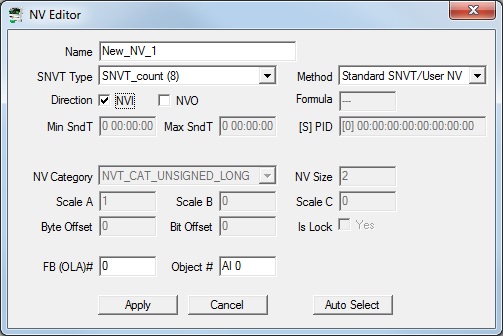
Quite likely some or all of the NVs will not be going in the direction you desire. If that is the case, double click on the NV to open the NV editor and change the direction. In our example case, we want to monitor NVs as BACnet Analog Inputs. To bind NVs in a direction that allows data to flow TO the gateway, the NVs must be NVI (Network Variable Input).
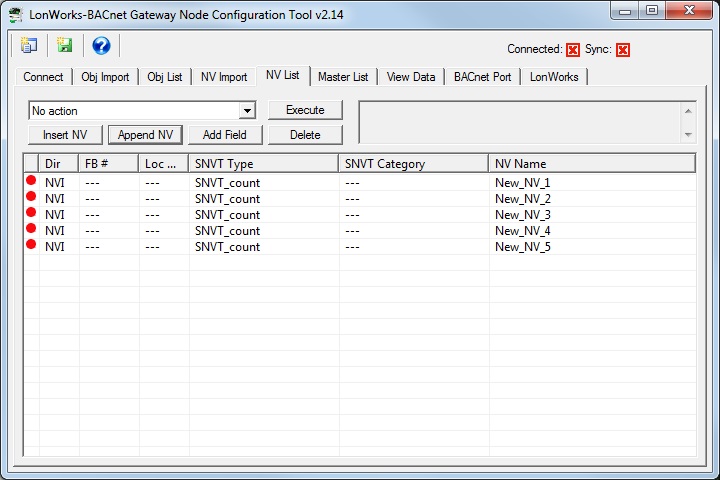
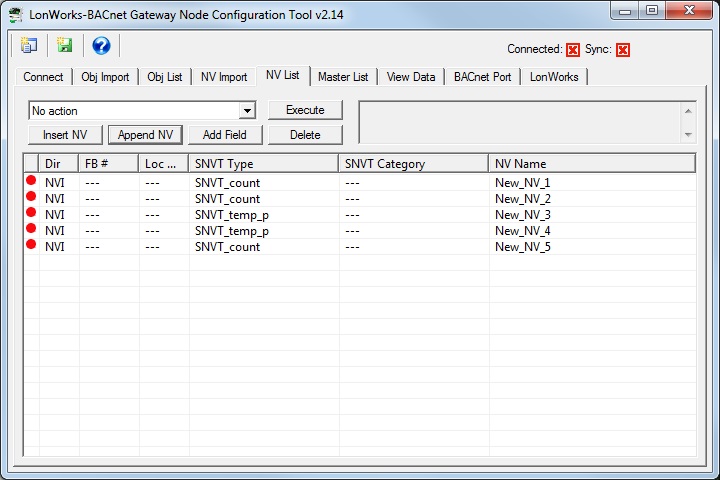
We have now changed the direction of our NVs to be all NVI.
You are also most likely going to want some SNVT types other than just SNVT_count. To do this, double click on the NV and select a different type from the list.
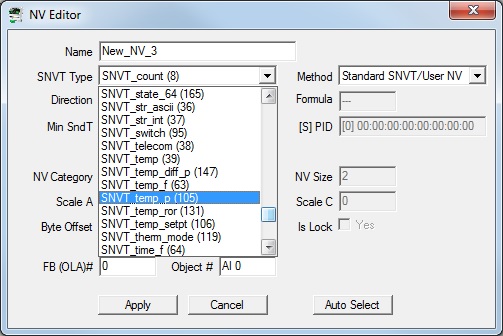
You can change the SNVT type and NV direction at the same time. You may also change the NV name in the NV Editor at the same time, or come back and do that later. But do not do anything else at this point - do not set anything other than 0 for FB # or Object #. That comes in the next step.
In our example, our NV set now looks like this:
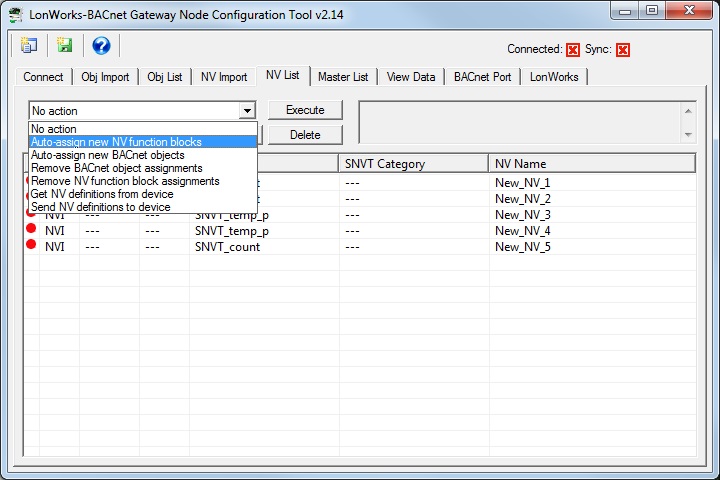
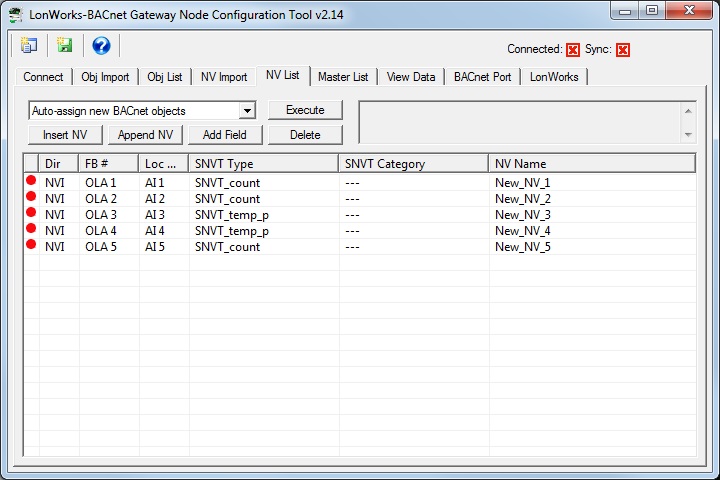
Now you can proceed with some assignments. From the action list, select “Auto-assign new NV function blocks” and click Execute.
Next, select “Auto-assign new BACnet objects” and click Execute. A dialog will ask about converting SNVT_switch. If any of your NVs are SNVT_switch, answer accordingly, or just click OK.
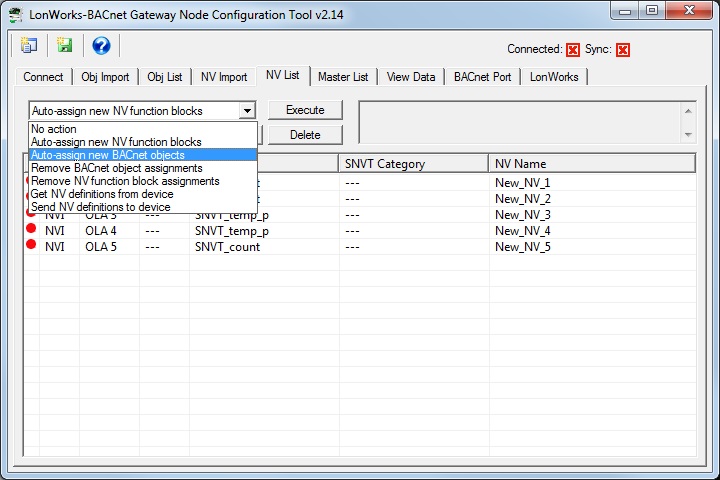
The NV list will now appear as follows:
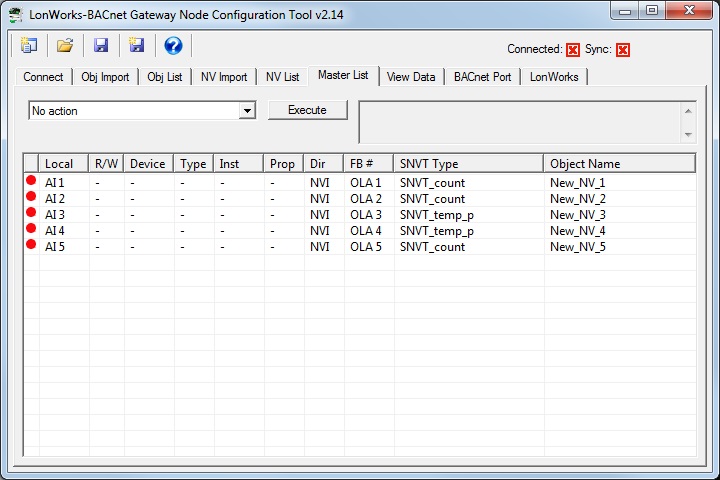
The Master List will appear as illustrated below. The blanked out columns would only be populated if the gateway was acting as a Client, but we have configured a Server, so these columns are unused.
You are now ready to send this configuration to the gateway. Go back to the Connect page and get connected, and then follow the same “send” sequence as you would for a gateway that was acting as the client.
Article ID: 40
Created On: Wed, Sep 20, 2017 at 10:39 PM
Last Updated On: Wed, Sep 20, 2017 at 10:39 PM
Online URL: https://info.csimn.com/article.php?id=40