Demo #1: Building a very simple page that covers the basics
Demo web #1: Displaying dynamic data. In this tutorial, we will build a very simple page that covers the basics of displaying real time data on your custom web page.
First, let's get some house keeping out of the way. Start by selecting "New Project" from the File menu.
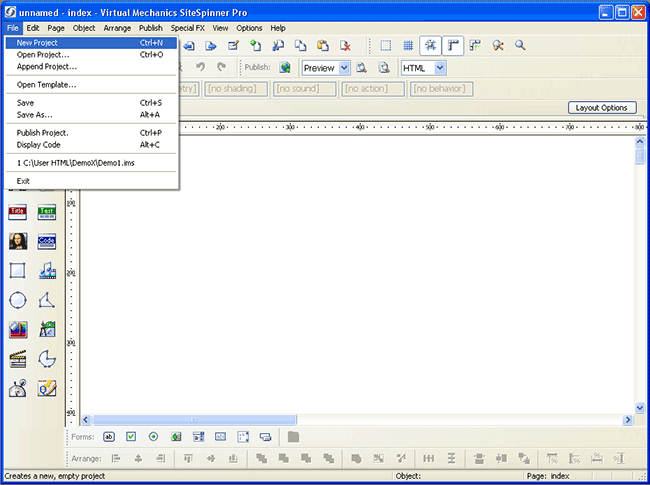
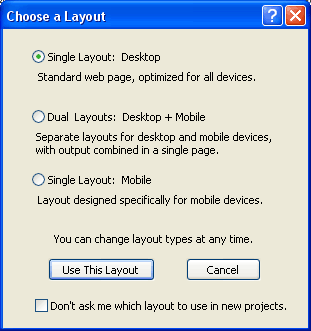
Select Single Layout, and click Use This Layout.
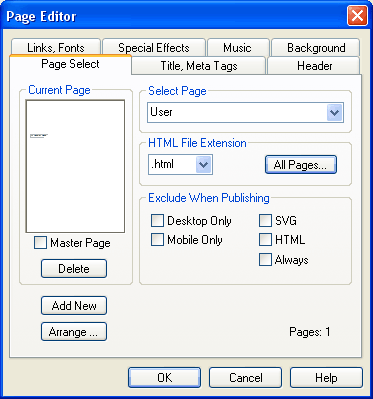
Next we need to give our page a file name. The top level page must always be User.html in the i.CanDoIt server.
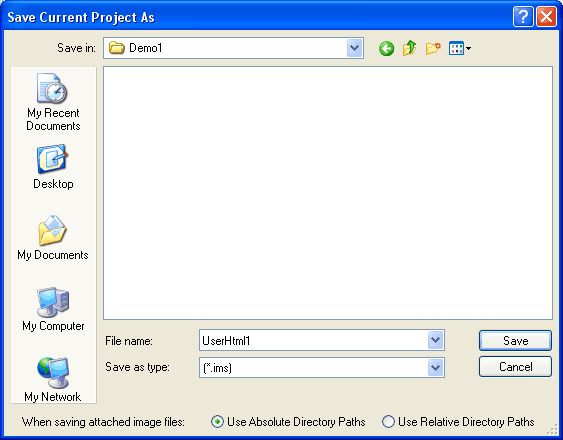
Even though we don't have much to save yet, go ahead and save it so our project has a name. The project will have a *.ims suffix. To get our HTML pages from the project, we will "export" them later.
At this point, you are ready to begin adding content to your first page. Let's begin by adding some simple text to the page.
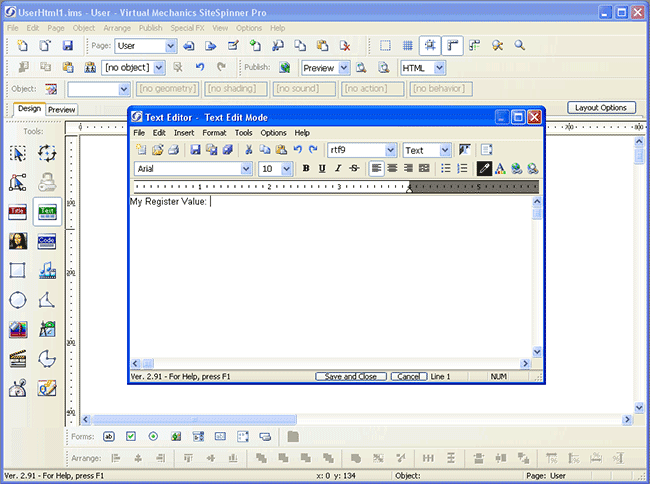
Click on the Text icon in the toolbox on the left. The text editor dialog will appear. Type in your text, and do whatever editing and formatting you like. Click the Save and Close button at the bottom of the dialog to close this window and place your text on the page.
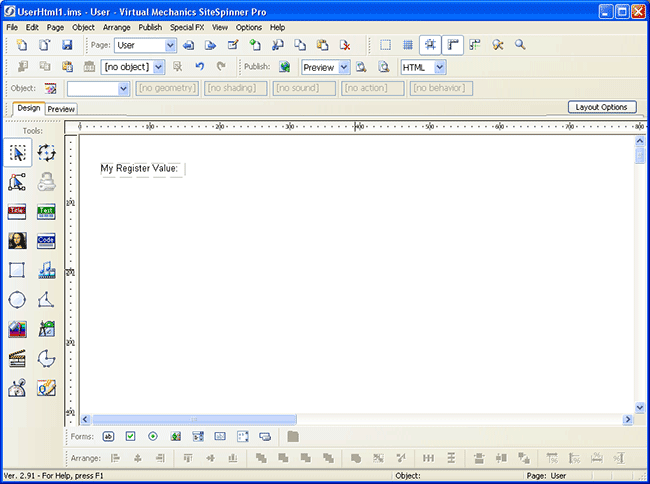
The text will initially drop into the middle of the page. Simply drag the text box where you would like it, and resize it as needed. The resulting text should look something like this:
Now let's proceed to add dynamic data to our page.
Click on the "Draw a Form Text Box" icon in the tool bar at the bottom (yours may be further to the right). Now as you move the cursor over the page, you will be dragging a box. Click where you want to place it. While the box is highlighted as shown below, you can use the arrow keys to nudge it around.
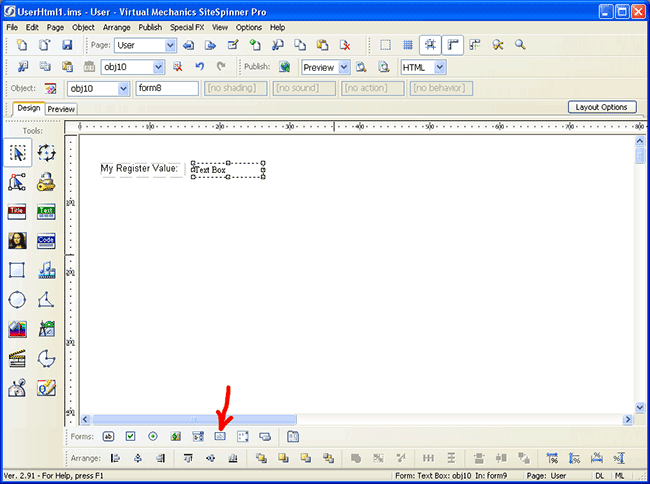
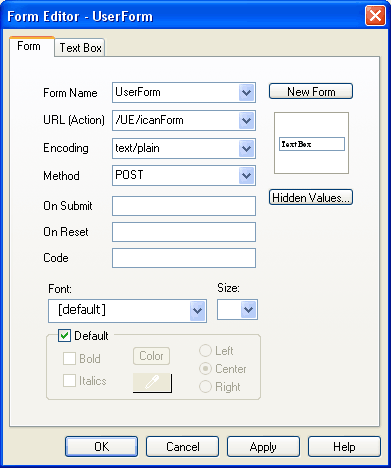
Double click the text box. A dialog with two tabs will appear. The first tab is the Form tab, and should be filled in as shown here.
The second tab is the Text Box tab, and should be filled in as shown here.
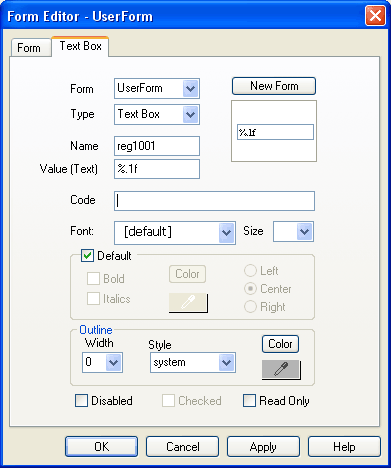
The name and value used for your text boxes are important. They tell the server where to find data. If you click Preview right now, all you see in the text box is "%.1f". We want the i.CanDoIt server to put real data in here when we view this page on the server. The trick for causing that to happen is correctly naming the text box.
Text box names that begin with "reg" will be replaced with data from the register number that is tacked onto the end of "reg". In our example above, "reg1001" will display the contents of floating point register 1001 on a Modbus server, or a floating point value from Analog Output #1 on a BACnet server. Refer to the “Register number and name tagging” article for a reference on register numbering.
The "value" is really a formatting string that tells the server how to format the number representing the contents of the register. In preview mode, we only see the formatting string. When this page is served by i.CanDoIt, this will determine how the number from the named register is formatted for display. Refer to the “Text box HTML syntax” article for formatting string reference.
At this point, you can go ahead and load the page into your i.CanDoIt server. We are going to add one more text box first in our example. Adding this is optional in your first exercise.
Proceed as follows to add more text and another data element.
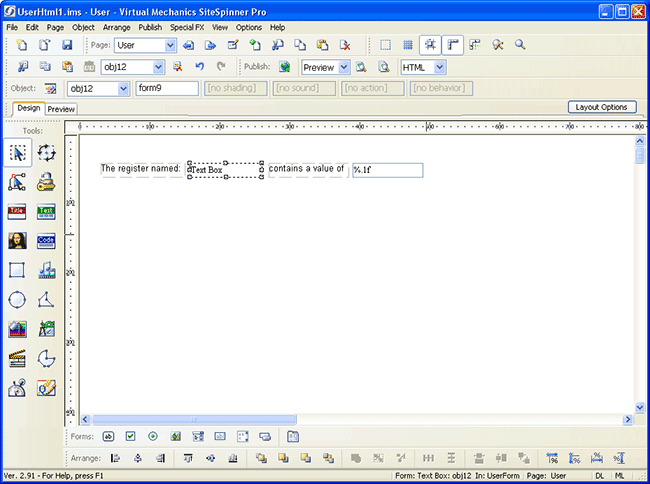
Double click the text we already had to change its content. Click the Text icon on the left to add another text field. Move our text box with reg1001 over, slide in the new text, and finally click the form text icon at the bottom to add a second text box for dynamic data. The page should end up looking something like this:
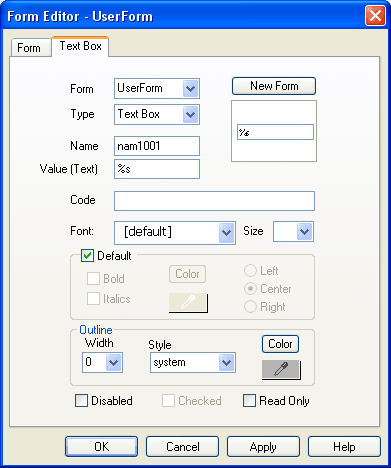
Double click the text box. Fill in the Text Box form as follows to provide the register name from the server. Be sure to select UserForm from the form list.
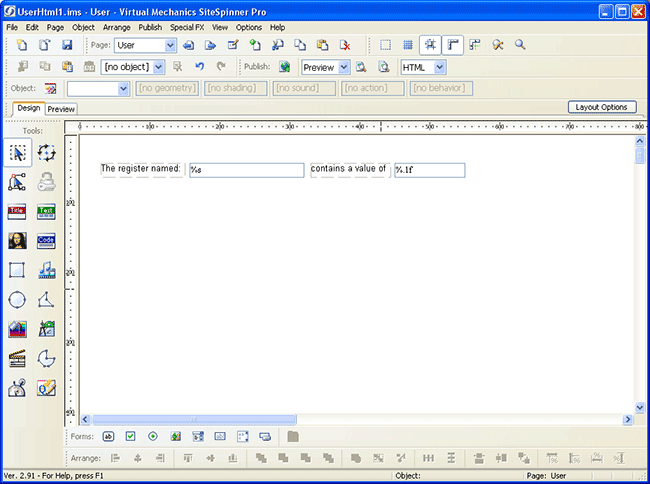
Our page should now look something like this:
We are about ready to save and publish our new web page. First of all, it is a good idea to preview it. You can preview your page in your choice of browser. Click the preview button shown here:

Clicking the preview button will open the browser of choice, and display our new page. It will, of course, not contain real data yet.

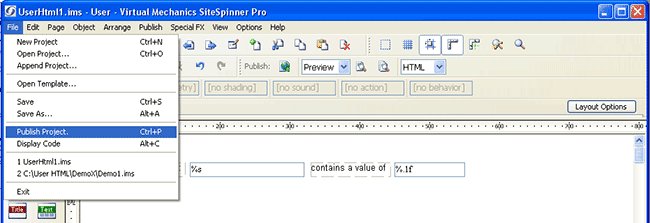
Now select Publish from the File menu.
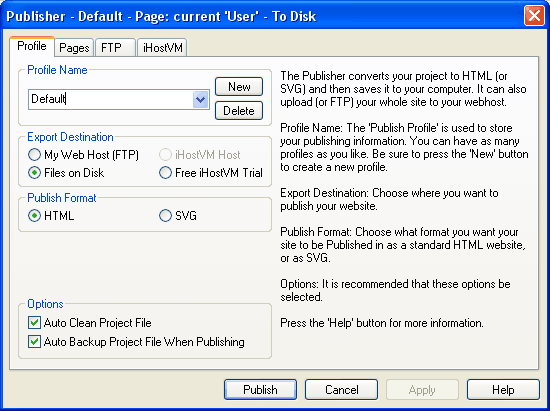
The publish dialog will appear. Select export destination as "Files on Disk", format HTML. Then go to the Pages tab.
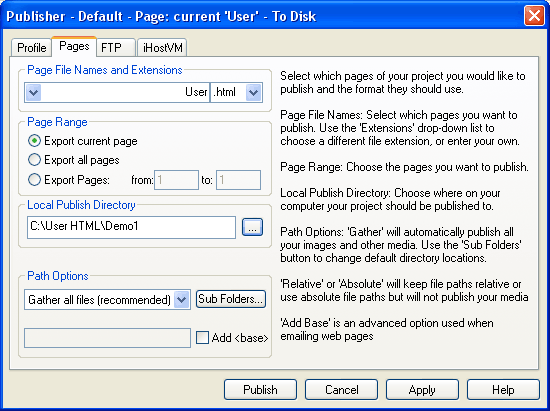
On the pages tab, select a destination folder where the HTML files will be placed.
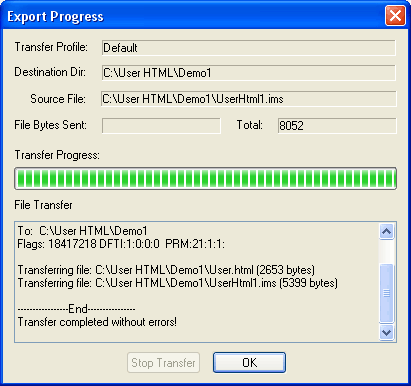
When done, the following progress dialog will appear. Click OK, and you're done. Next, upload the HTML file(s) to the i.CanDoIt server.
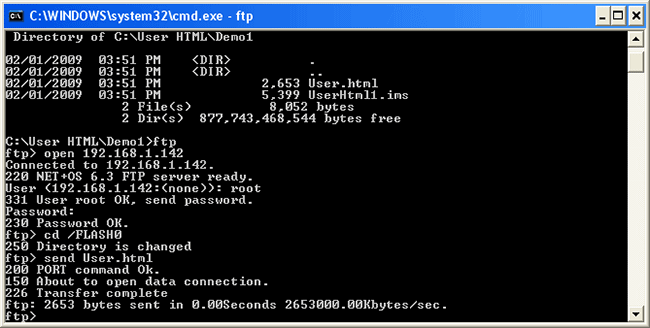
FTP clients such as WSFTP will work if you find enough buttons to turn off options i.CanDoIt does not recognize. The one method we know always works is FTP from a command prompt. Change your working directory to the location of your User.html, and type "ftp" to get the FTP prompt.
Enter the "open" command followed by your device's IP address. If the FTP client finds the device, it will ask for user name and password. (User "root" and password "buster" are defaults.)
Change directory to /FLASH0. (Important!)
Then "send User.html" and you're set.
Open a browser and browse to your device's IP address. It will default to serving up User.html if it finds a file by that name.

