Demo #4: Adding JavaScript animation and real time data
Demo web #4: JavaScript animated graphics. In this tutorial, we kick things up another notch with JavaScript animation and real time data.
This exercise is not for beginners, but it does illustrate the fact that some fancier things can be done with HTML, JavaScript, and SiteSpinner as the page building tool. Here is what our finished page is going to look like:
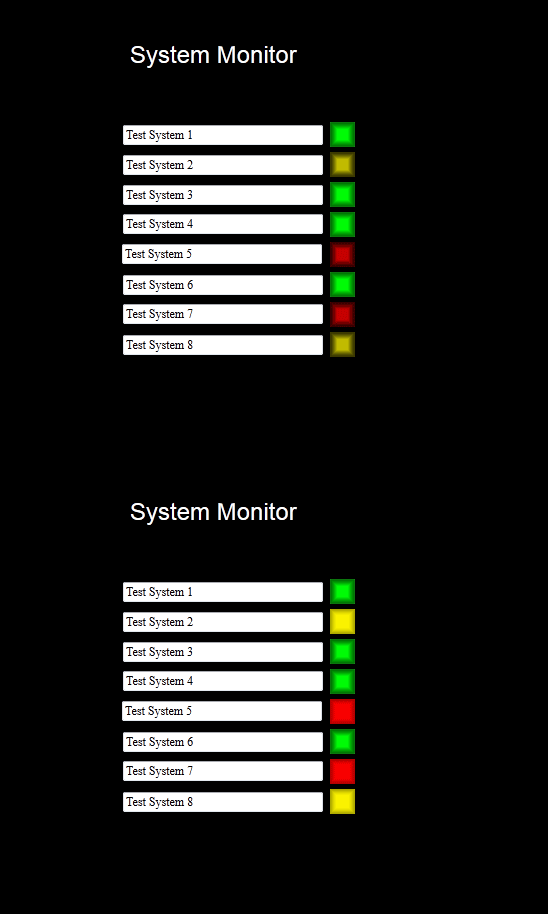
The fact that the lights are blinking is nothing more than GIF animation. But changing colors is done by swapping which of several graphic files are used as the source of the image in the light position. JavaScript decides which color light to display by examining the contents of registers, selecting green if a register is below its threshold, red if above, and yellow if zero (suggesting sensor disconnected).
This demo does not include any "how to" on JavaScript programming. That requires a trip to Barnes & Noble. Or visit this link: https://developer.mozilla.org/en/About_JavaScript.
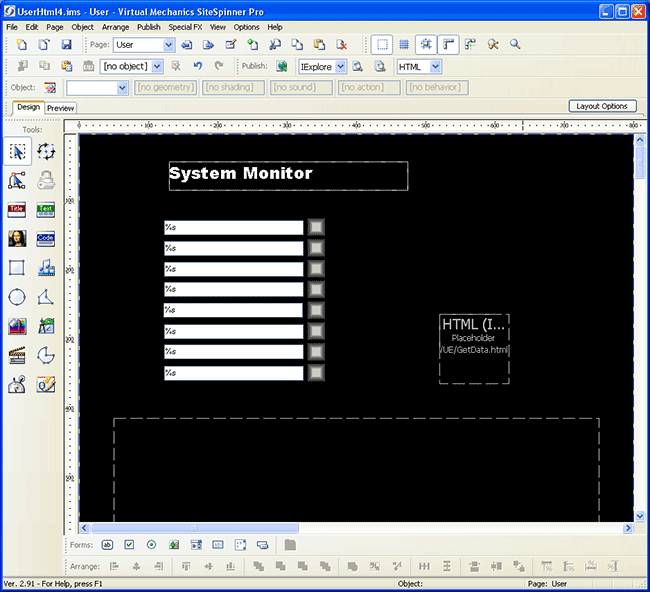
We begin building the visible page by placing some text boxes that are going to hold names of what we are monitoring, and place some graphics using the gray button as a place holder. For each of the gray buttons (which will become our lights) we need to select the graphic, then select the Geometry Editor. We need to add the code name="state1" for image 1, name="state2" for image 2, etc. This reference is used by JavaScript to later replace the image with a different color.

We also click the Code icon in the tool bar at the left. This opens a new editor dialog. We insert our JavaScript into this box. The code shows up on the page in design mode as a place holder, but is not visible in preview or when the page is actually served. You can see the logic for image #1 in the screen shot above. To review the entire script, take a look at the example project (available for download).
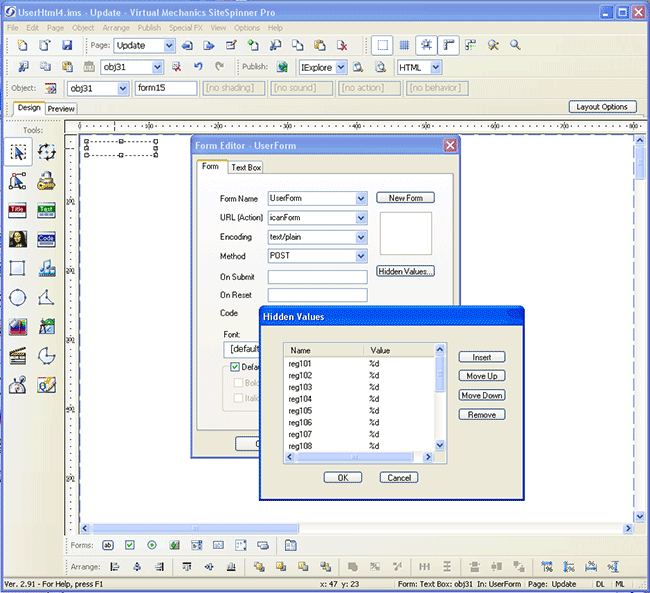
Note: This tutorial works as is only in Firefox. The dual personality implementation of the same page (works simultaneously in Firefox and IE) has only a single User.html page, and no inline frame (no Update.html or GetData.html) as outlined on the following pages of this tutorial. For the dual personality version, stop here, and use Demo4_R1 (zip). The only down side is that it does generate more network traffic. The hidden values are still used in the R1 demo, and these are shown below.
Note: The R1 version of IE/Firefox compatibility generated a lot of network traffic. The R2 version (Demo4_R2 zip) takes advantage of the fact that the i.CanDoIt servers will respond to a multiple-register query. In this example, we ask for all 16 registers at once, and we only do this once every 10 seconds. It cuts down on network traffic. The full query string must be limited to 250 characters. If you need to break up your query, you can do multiple registers per query, and do multiple queries. Just add more cases to the request builder as illustrated in R1 of this demo.
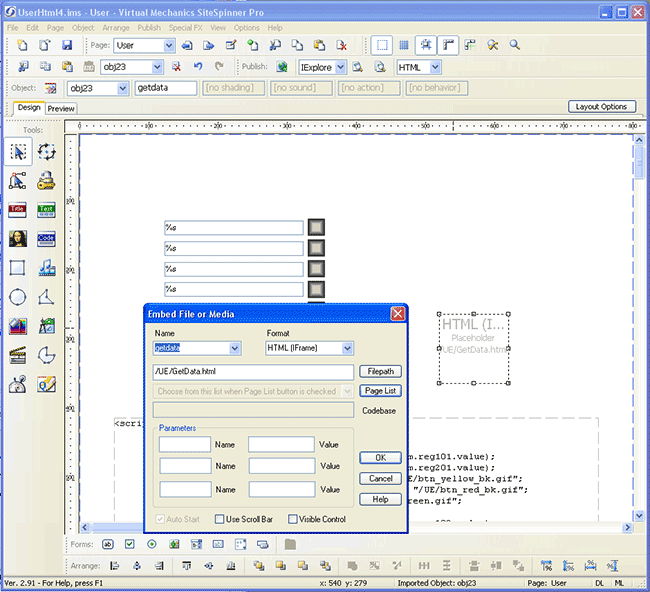
Continuing on with the original version of the demo, the next bit of trickery is to place an inline frame on our main page named User.html. The name we give this frame will be referenced by JavaScript, so if it is changed here, it also needs to change in the code. Create the inline frame by clicking the Embed icon (music note) on the left. When the embed dialog opens, make entries as shown below.
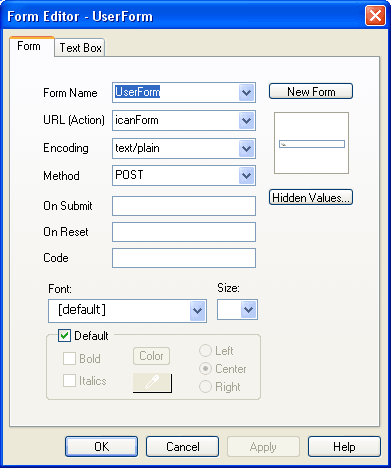
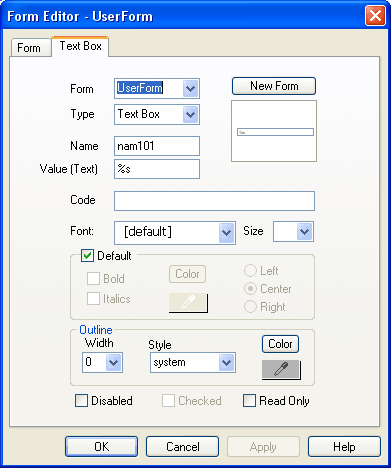
Each of the text boxes is edited following the same general guidelines already used in our previous demo webs.
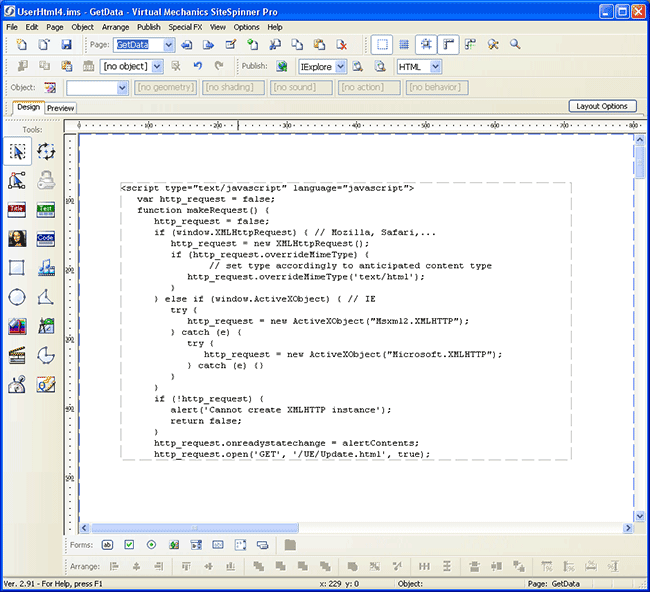
Next we need to create a blank page named GetData with nothing more than some JavaScript code. This code is going to repeatedly submit a Get request to the server to get a fresh copy of the data found in the registers of interest. This is what makes the page "real time". The code appears in the design view as a place holder. You can inspect the full source code in the demo download.
Now we create a third page named Update.html. This is the page that GetData.html will repeatedly get from the server. The only thing on this page is a text box we don't use for anything more than a place holder to cause forms to happen in SiteSpinner. The data of primary interest is the list of hidden values we get at by clicking on Hidden Values on the Form tab of the Form Editor. Click the Insert button in the Hidden Values dialog to add the list of registers 101-108 and 201-208 (for this particular example). Nothing on this page will actually be visible. Later on, we want to push the text box down, and set the background color to black.
The final thing to do is go back to each of our three pages, select Edit Page Properties on the Page menu, and select a background color of black on the Background tab of the properties dialog. We have also added a title to the visible page. Note that although we have three pages technically defined, only one of these pages will be visible while the other two are busy behind the scenes creating the effect of "real time".

 15.38 KB)